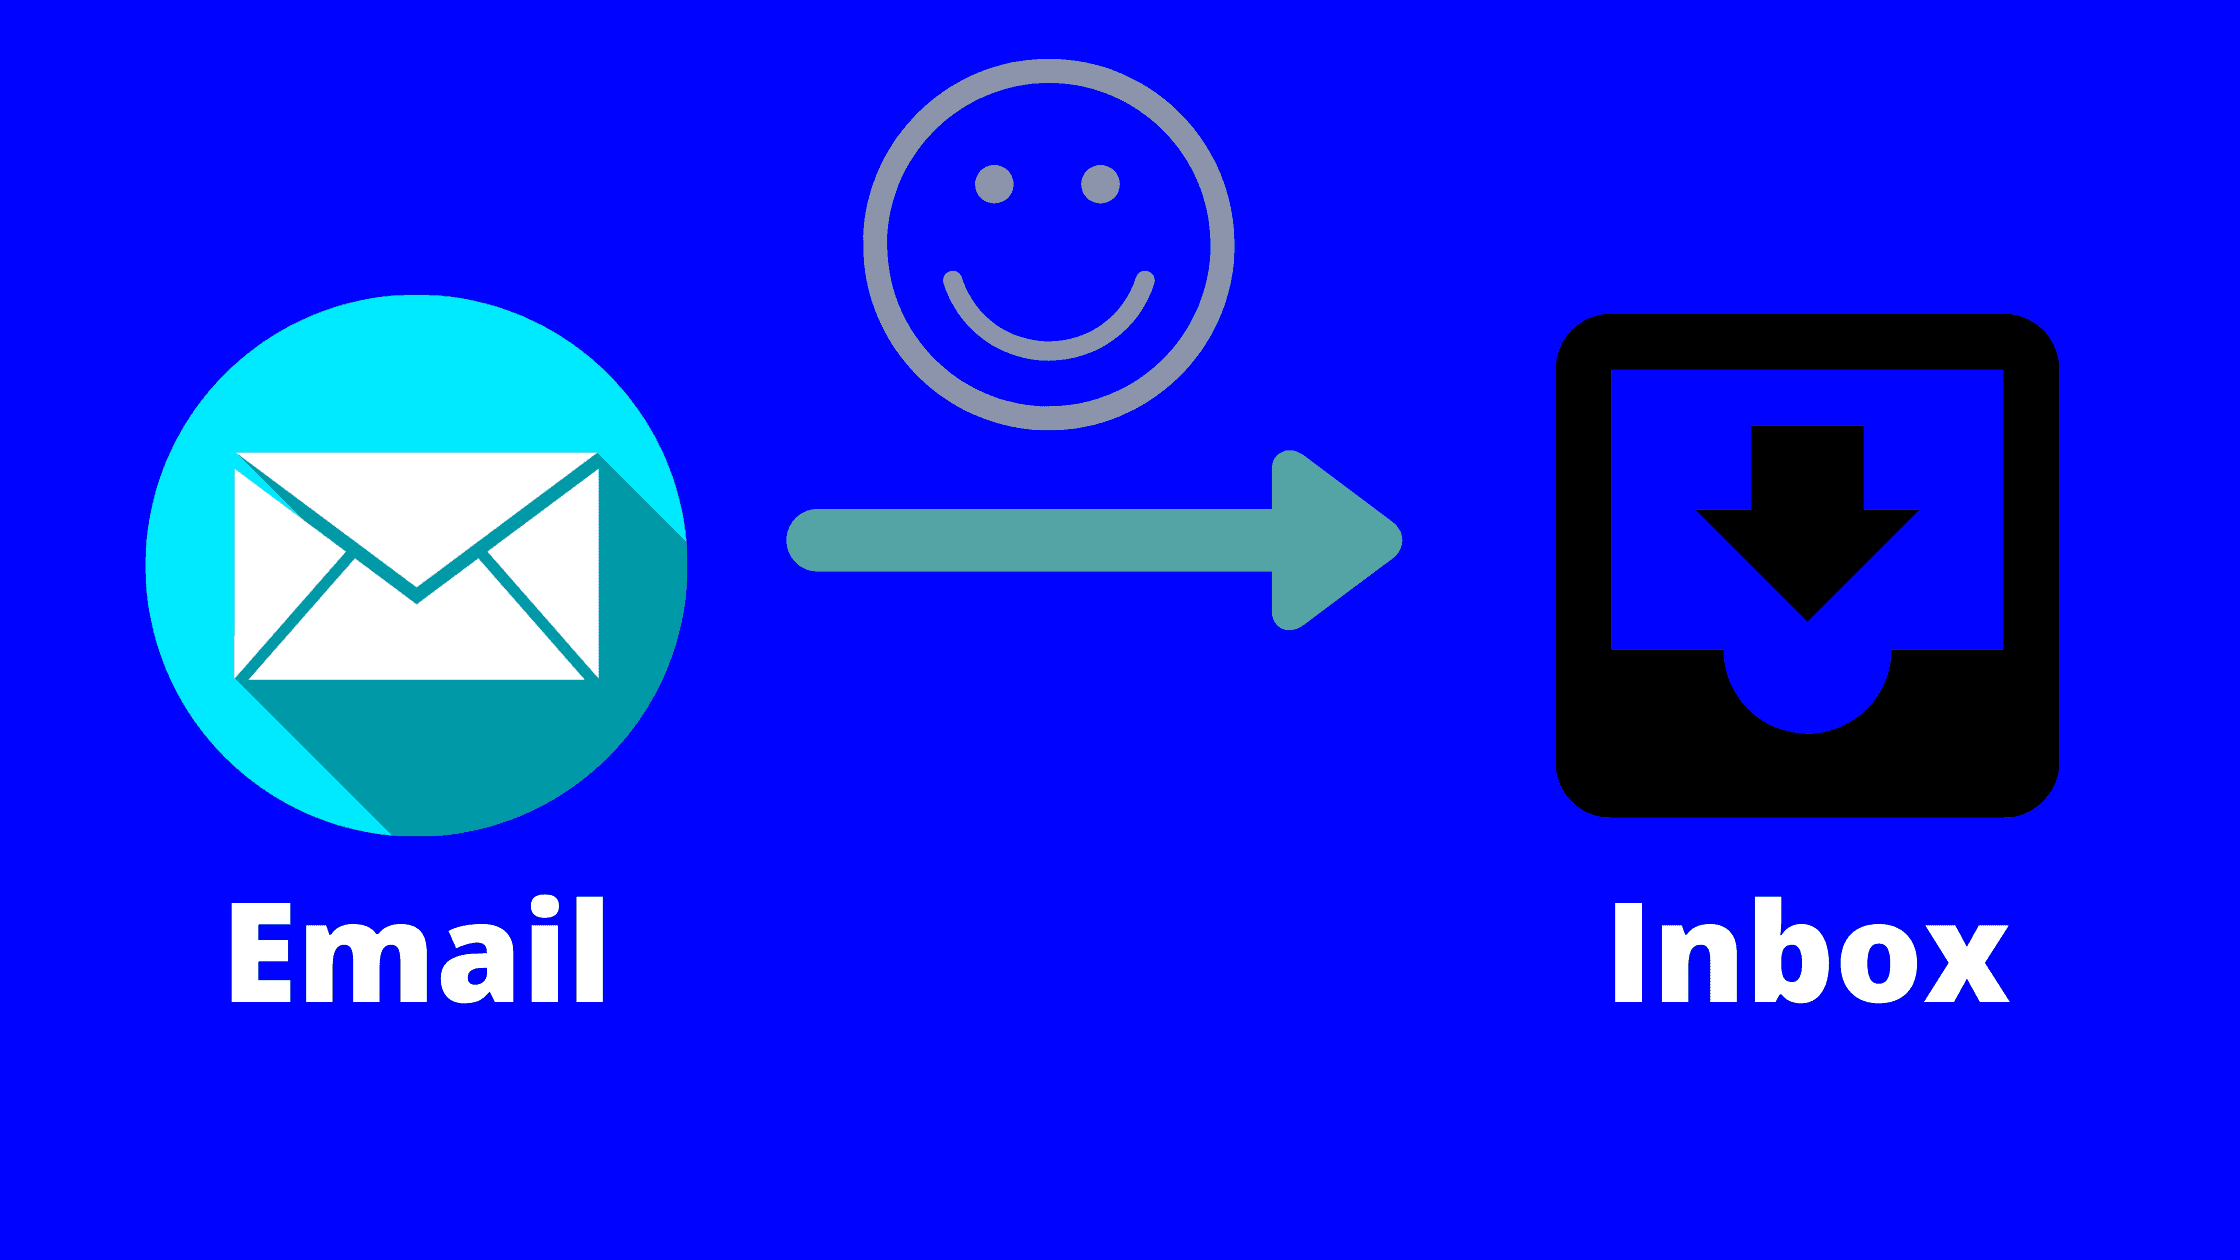
Your efforts become useless if all of your emails land in subscribers’ spam and promotion folders. This is really important that all the emails you send, it must land in their inbox.
Because only people see those emails which they found in the inbox. Also, we get notified of a new email when it lands in the inbox only.
In today’s article, I will discuss a few basic points and tricks to write and send your email that all of your emails will directly hit the subscriber’s inbox.
Table of Contents
Pass spam filters:
Behind every email system like Gmail, Yahoo mail, etc. there is a filter option to protect email receivers from any kinds of fraud or illegal activities, this is called “spam filters”. This depends on the mail server, which email it will send to the inbox, and which one to the spam folder. So, the mail server has artificial intelligence to filter out spam activities.
Whenever you are sending bulk emails in a single shot, the spam filter will become active. So, any type of spamming activity will land all your emails in the receiver’s spam folders. Even for an inconsistent small number of emails, a spam filter will do its work.
Now let’s start with the factors that will land all your emails in the receiver’s inbox:
1. The subject line of an email:
Make sure there must not be any spammy words in the subject line and the body of the email. Now the question is how to know which words will be treated as a spammy word?
Sendcheckit dot com is a free online tool, from where you can check the quality score of your subject line. If your score is more than 95 then you can consider it a good subject line for your email.
Now let’s start with an example. I have written a subject line “NOW it’s FREE to sign up”. I just put my subject line in the Sendcheckit dot com. The result is shown below:
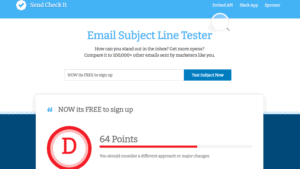
The point is 64. That means this is not a good subject line. The reason for the low score is the word “FREE” looks spammy and there is unnecessary capitalization. With this type of subject line, the maximum chance is to land the emails in the spam folder.
Now consider this subject another line “digital marketer? sign up 👍”
The result is shown below:
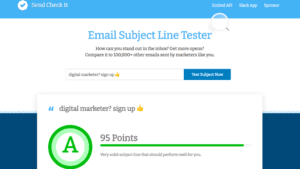
Now the score is 95. This we can consider a good score as a perfect subject line.
2. The message body:
In the message of the body, there must not be any spammy words. Examples of some spammy words are “$”, “FREE”, “MONEY” “EARN” etc. For details of spammy words, you can check it on google.
Do not use too many images in your email body. A spam filter works actively in a suspicious way when you use any image in your email. My suggestion is not to use any image when you are sending bulk email campaigns. Use only simple text with the basic information.
Do not use too many links to your email body. The use of many links considers suspicious in front of a spam filter. The best practice is to use one link to promote your product or services.
3. Always use a custom domain:
For any of my email campaigns, I always use the custom email address instead of “Gmail” or other emails. My domain is “highqualitylead.net”, I use my custom email address info@highqualithlead.net to send an email campaign. Using a custom domain will increase the rate of sending emails to the inbox.
Before sending an email campaign make sure your custom domain must not be blacklisted. You can check it from backlist checking tools. If your domain is very new, it will show backlisted, this will remove from the blacklisted list after 20 to 30 days.
Here I want to give a bonus tip for you. Do not use your primary domain while sending cold emails. Because if for some reason your domain gets blacklisted, your primary domain will still be safe. So, buy another domain for your cold email marketing campaign.
4. Postmaster tool of Gmail:
To monitor your email sending level and to identify any kinds of problems, it is required to add your domain to the Gmail postmaster tool. This tool will monitor spam rate, authentication, and reputation.
5. Inserted links to the email body:
Make sure that whatever the links and URLs you are inserting into your email body, that domain must not be a blacklisted one. Also do not use any unsafe links. You can check your link through the google safe browsing tool.
This is ok to use affiliate links to your email body directly after checking it by the google safe browsing tool. But I personally use my website or landing page link instead of direct affiliate links. By doing so, I get traffic to my website and also to my affiliate marketing links.
6. Cloak your affiliate links and URLs:
You can put your affiliate links to your email body directly. But sometimes these affiliate links may create issues for your email marketing campaign.
The best practice is to cloak your affiliate links before using them in your email body. URL cloaking is the process of putting a mask in your original URL. So, by cloaking you can hide the URL and it will look like a normal link. I personally use the WordPress plugin “pretty links” for cloaking any affiliate links.
To make shorten your links you can use URL shorteners. Bit.ly is one of the best platforms to shorten your links.
7. Tracking your emails:
When we track any emails to know like open rate and link click rate, this may also cause emails to trigger to the spam folder. Because at the time of tracking a small pixel inserted in every email. Through that pixel, only the server can track all the data. Anyway, tracking is an important part of the email marketing process.
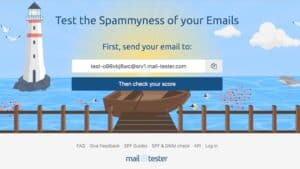
8. Check your overall score while sending an email campaign:
There is a free tool available, from there you can check the sending score of your email. The name of the free tool is mail tester. Make sure that your sending score must be 9/10 or 10/10.
Here I want to mention few factors, that can make your sending score higher:
- Sending policy framework: You can’t use any other reputed domain names instead of your own. If you do so, that means you are trying to spam. In the same way, you can restrict others to use your own domain by setting the sending policy framework(SPF)
- DomainKeys identified mails(DKIM): This is nothing but a private key, which is stored inside the DNS. This is required to gain a high score because it provides a safeguard of your email originality.
- Domain-based Message Authentication, Reporting & Conformance (DMARC): If any email is not authenticated by the SPF and DKIM, then DMARC will identify those emails. This will protect against any type of malicious activity.
9. SMTP server warm-up:
When you are sending emails through your SMTP server with a brand new IP, there is no reputation of your IP, and internet service providers don’t know your IP. So, by warming up your new IP, you can build a reputation. To warm up your SMTP server you need to schedule your emails from small numbers to higher volumes. This is good to start with 20 emails on the first day and you can increase the numbers every single day.
10. Niche-based email list:
Make sure that your subscriber must be interested in your niche. For example, if your niche is “weight loss”, you must send the people who want to hear about “weight loss”. If your email list is not relevant, there will be very little open rate and many people will unsubscribe. These data may affect your next email campaign.
11. Reduce bounce rate:
Make sure that most of the emails must be active, there will be no spam traps and less complaint rate. Invalid and inactive emails will lead to you a higher bounce rate. A higher bounce rate has a negative impact on your reputation.
12. A/B split testing for email campaigns:
Always test your emails with different variations. Send different types of emails with different headlines and body to small numbers of peoples. Check the statistics first. Choose that particular email, which has a higher open rate and higher link clicks.
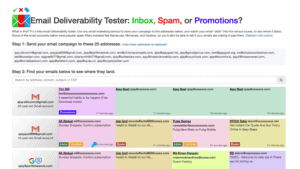
13. Test your email campaign before sending it:
I always test all my email campaigns before sending them. This is important to know your email campaign is performing perfectly. For testing your email campaign you can use Gmass email tester. By using Gmass email tester you can check whether it is a trigger to the inbox or spam folder. Also, you know your emails are passing spam filters or not.
Conclusion:
After checking every aspect also this is not sure 100% of your emails will trigger to the recipient’s inbox. But if you follow all the points and fix everything, I am more than sure that 90% to 95% of your emails will trigger to the inbox. So, follow the basic rules and make your email campaign successful.